📌 Introduction to Optical Microscopy
The discovery of the infinitesimally small has revolutionized our perception of the world, opening new horizons in biology, materials science, and medicine. The optical microscope remains a fundamental instrument for exploring this hidden reality. In this article, you will learn how to properly use an optical microscope by mastering its settings, maintenance, and also discovering the errors to avoid to fully enjoy the possibilities offered by microscopy. You will also discover how to optimize your observations and what technological advances are transforming this fascinating field.
📌 Understanding Optical Microscopes
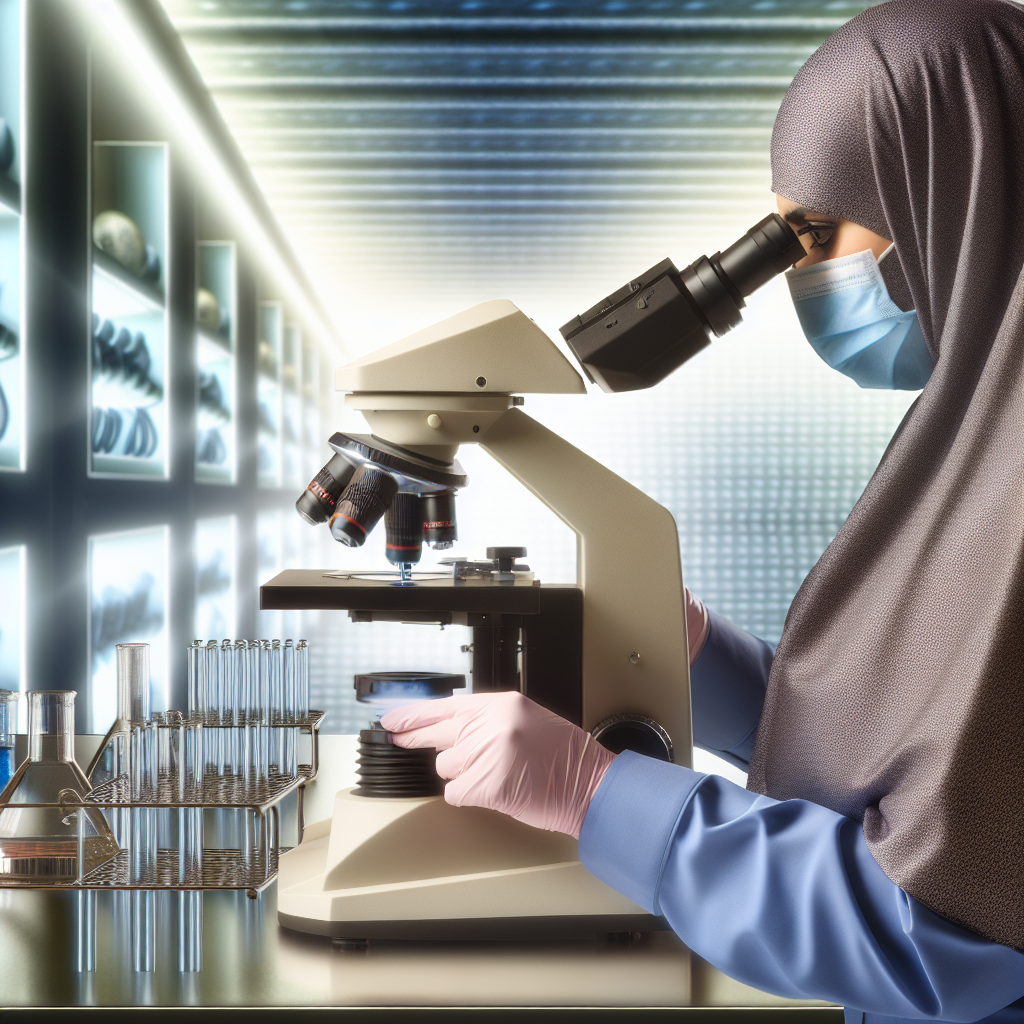
An optical microscope, also known as a photonic microscope, is an instrument that uses visible light and a lens system to generate a magnified image of an object invisible to the naked eye. It stands out for its versatility, ease of use, and ability to reveal the structural details of living cells, tissues, microorganisms, or materials.
Optical microscopes are widely used in biology, medicine, scientific research, education, and also in industry for quality control of materials and mechanical parts. Their widespread adoption is due to their remarkable ability to offer a direct and intuitive observation of the microscopic world.
The essential components of an optical microscope include interchangeable objectives, an eyepiece, a light source, and various adjustment systems. Thanks to their different accessories (cameras, heating stages, filters), they can be adapted to a wide variety of applications.
Before going into the details of their use, it is essential to understand the different types of optical microscopes available, as each model offers specific functions and advantages.
🔍 Types of Optical Microscopes
- Compound Microscope: This is the most common type in school and professional laboratories. It combines several lenses (objectives and eyepieces) to offer high magnifications (up to 2000x). Ideal for observing very thin sections, cells, bacteria, and tissues.
- Stereoscopic Microscope: Also called a binocular or low-magnification microscope, it provides a three-dimensional image with low magnification power (up to about 40x). Preferred for examining thick objects such as insects, plants, and minerals.
- Inverted Microscope: The objective is located below the stage and the light source above. Particularly suitable for observing living cells in culture dishes and in advanced cell imaging.
Each model has its own peculiarities, and it is important to choose the one that best suits your needs. To deepen your knowledge and compare different models suitable for your use, do not hesitate to consult the optical microscope collection offered on our website.
📌 Parts of an Optical Microscope
Understanding each component of an optical microscope is essential for effective use and to fully exploit its performance. An optical microscope consists of two main sub-assemblies: the mechanical system and the optical system.
The mechanical system ensures stability, parts mobility, and specimen fixation. It includes:
- The base (or stand), ensuring stability
- The arm, which connects the base to the optical assembly
- The stage, a platform on which the slide to be observed is placed
- The mechanical stage, a movable platform allowing the sample to be moved
- Coarse and fine focus knobs, for focusing
The optical system includes:
- The eyepiece, through which the image is observed
- The objectives, lenses located near the sample, with different magnifications
- The condenser, placed below the stage, which concentrates light on the specimen
- The mirror or integrated LED light source
- Diaphragms, controlling light intensity and contrast
Correct use implies knowledge and mastery of each element.
🔍 The Optical System
- Objectives and Eyepieces: The combination of the eyepiece (generally x10) and the objective (x4, x10, x40, x100) gives the total magnification. Progressively switching from a low power objective to a higher power one allows for precise exploration of the specimen.
- Light and Condensers: The choice of illumination mode (incident, transmitted, or episcopic light) strongly influences image quality. The condenser, adjusted to the correct height and with an appropriate diaphragm, improves contrast and resolution.
The use of complementary accessories (contrast filters, polarizers) further enriches the experience, especially for specialized applications.
📌 Preparation for Use
Optimal use of an optical microscope requires method, care, and certain preparatory steps. Before starting the observation, it is important to check the condition of the device and adopt a specific approach to prepare the sample and adjust the different components.
Regular maintenance (cleaning lenses, checking focus screws, maintaining the light source) is essential to ensure the longevity and performance of the instrument. Following a checklist before each use reduces the risk of breakdowns and errors.
- Check the general condition (cleanliness, absence of dust on the stage, objectives, and eyepiece)
- Gently clean the lenses if necessary with a specific microfiber cloth
- Position the light source and check that it is working correctly
- Ensure the mobility of the mechanical stage to precisely move the slide
The slide to be observed must then be prepared correctly. Handling fragile samples (tissues, cells, microorganisms) requires gentleness and precision, as does the application of a cover slip.
Careful positioning of the sample and progressive adjustment of the light are key steps to obtain clear and informative images.
🔍 Correct Setup
- Sample Positioning: Place the slide on the stage, hold with the stage clips, and precisely center the area of interest above the condenser. Use the mechanical stage for any fine adjustments.
- Light Adjustment: Start with a low light intensity then gradually increase to avoid glare. Adjust the condenser height and diaphragm to enhance contrast without sacrificing clarity.
Good illumination combined with careful preparation makes all the difference in microscopy, helping to avoid the appearance of artifacts or blurry areas.
📌 Observation Techniques
Observing with an optical microscope requires a minimum of technique to ensure accurate and usable images. Observation techniques vary depending on the type of microscope, but the basic gestures remain the same: adjusting magnification, light, contrast, and focusing.
The choice of observation mode (brightfield, darkfield, phase contrast, fluorescence with appropriate accessory) determines the visibility of details of a given sample. An attentive user will know how to adjust the parameters to maximize readability without altering the image.
- Determine the appropriate magnification level for the desired study
- Use slow and progressive movements to change objectives
- Patience and precision when focusing
- Adopt a stable posture and adjust lighting to relieve eye strain
🔍 Focusing Adjustment
- Coarse Focusing Technique: At the beginning of observation, use the coarse focus knob to quickly focus with the low power objective (x4 or x10). Carefully lower the objective until the specimen is seen, then fine-tune.
- Fine Focusing Technique: Switch to the fine focus knob with high magnification objectives (x40, x100) to achieve ideal sharpness on the area of interest. Always make small movements to avoid crushing the slide or damaging the objective.
Tip: It is often preferable to start with the lowest magnification to locate the sample before moving to higher powers.
Mastering focusing prevents eye strain and allows for detailed analysis, especially when photographing or filming observations.
📌 Increasing Resolving Power
Resolving power is the ability of the optical microscope to distinguish two very close points as distinct. It depends on the quality of the objectives, the refractive index of the traversed media, and the light adjustment. Some good practices can increase the resolution and sharpness of the obtained images:
- Use an immersion objective (x100 oil immersion objective) for observations requiring maximum resolution. Apply a drop of immersion oil between the coverslip and the objective to increase the refractive index and reduce light diffraction.
- Precisely adjust the condenser height and diaphragm aperture to optimize contrast without losing details.
- Regularly clean the optics, as the slightest mark limits optical quality.
- Prefer high-quality slides and coverslips, perfectly transparent and free of defects.
Also, remember to adapt the color and intensity of the illumination according to the nature of the sample. A blue filter, for example, sometimes improves the discrimination of fine details in white light.
Finally, combining several observation techniques (phase contrast, darkfield) can reveal structures otherwise invisible under a classical microscope.
📌 Avoiding Common Mistakes
Handling an optical microscope is not without pitfalls. Here is a list of errors frequently observed in beginners (and sometimes in more experienced users) and our practical advice to avoid them:
- Using dirty objectives: Dirt creates blurry areas or distorts the image. Always clean the lenses with appropriate products.
- Excessive illumination: Too much light can hide important details and strain the eyes. It is better to start with low intensity, then adjust it.
- Directly switching to high magnification: Always locate the sample at low magnification before magnifying the image to avoid losing sight of the area of interest.
- Using immersion lenses without oil: This can seriously damage the objective. Always follow the recommended procedure.
- Excessive pressure when focusing: A sudden movement risks breaking the slide or damaging the optics. Make each adjustment in small increments.
- Fingerprints on lenses: Avoid this gesture, as a greasy film degrades quality and can lead to long-term corrosion.
Master these points to get the most out of your device and protect your investment over time.
📌 Microscope Maintenance and Care
A quality optical microscope represents an investment: well-maintained, it will accompany you for many years with optimal performance. Here are the golden rules for effective maintenance:
- Regularly clean the lenses (objectives, eyepieces) without ever using abrasive products or unsuitable liquids.
- Dust the mechanical parts with an anti-static brush.
- Check the smooth movement of the knobs and stage.
- Protect the device from direct light, humidity, and temperature variations.
- Always close a protective cover after use.
🔍 Cleaning and Storage
- Lens Cleaning Procedures: Always blow away dust before wiping the lenses. Use a clean microfiber cloth, possibly dampened with a specific optical solution. Never rub with a tissue or ordinary wipe.
- Ideal Storage Conditions: Place the instrument in a dry place, away from vibrations. Avoid any contact with chemicals or solvents. Provide a carrying case for travel.
Regular maintenance limits premature wear and tear and durably guarantees observation quality. An annual check by a specialized technician is recommended in demanding laboratories.
📌 Practical Applications in Microscopy
The uses of the optical microscope are numerous and cover various fields:
- Cell Biology: Observation of cells, microorganisms, tissue studies, cell division monitoring, medical diagnosis.
- Materials Science: Structure and surface analysis, detection of microcracks, industrial quality control.
- Education: Discovery of living organisms, learning basic plant and animal structures by students.
- Pharmaceutical Research: Culture monitoring, identification of pathogens or biochemical reactions.
- Forensics and Scientific Police: Analysis of fibers, hair, residues, or microscopic evidence.
Each application corresponds to specific techniques (stained slides, fluorescence, polarization, etc.). This wide range of uses makes the optical microscope indispensable in many laboratories and classrooms. To discover more detailed information on choosing a device adapted to your practice and how to optimize the investment, consult this specialized article.
📌 Innovations and Future of Optical Microscopy
Far from stagnating, optical microscopy is experiencing a resurgence thanks to technological advances of recent decades. The most recent developments include:
- Super-resolution microscopy: Ability to exceed the theoretical diffraction limit (200 nm) using techniques like STED or PALM microscopy, opening the way for new discoveries in molecular biology.
- Digital and automated microscopy: Connectivity, high-definition image acquisition, ease of analysis and remote sharing thanks to the integration of cameras and specialized software.
- Smart LED illumination: Long-lasting lights, consuming little energy and generating less heat, perfect for the viability of living samples.
- Miniaturization and portability: Development of portable microscopes for field diagnosis or on-site studies in isolated areas.
- 3D printing of optical components: Acceleration of custom parts manufacturing and reduction of equipment cost.
The trend is towards the integration of artificial intelligence for automatic image analysis and decision support. In the future, the optical microscope will undoubtedly establish itself as an increasingly connected and collaborative tool, accessible to all science enthusiasts.
📌 Frequently Asked Questions — FAQ
- What is the difference between a compound microscope and a stereoscopic microscope?
The compound microscope offers high magnifications with a two-dimensional image, ideal for observing thin sections. The stereoscopic microscope provides a three-dimensional image and is more suitable for observing bulky or opaque objects.
- What is the best method for cleaning the lenses of an optical microscope?
Use an air blower to remove dust, then a microfiber cloth lightly dampened with optical solution. Avoid unsuitable chemicals that could damage the anti-reflective coatings of the lenses.
- How to focus without risking damaging the sample?
Always focus with the lowest magnification objective, using the coarse focus knob. Switch to the fine focus knob to adjust finely without crushing the slide or hitting the objective.
- Why does a microscope's white light sometimes create low-contrast images?
Excessively intense white light can reduce contrast. Use the diaphragm to adjust the amount of light, and add a blue filter if necessary to enhance fine details.
- What criteria should be considered when choosing a microscope for a student or beginner?
Prioritize robustness, ease of use, and basic optical quality. An optical microscope with a 10x eyepiece, 4x/10x/40x objectives, LED illumination, and stable focusing is an excellent choice for getting started.
- How long does a well-maintained optical microscope last?
A good quality model, properly maintained and stored in good conditions, can function effectively for 15 to 25 years, or even longer in a professional setting.
📌 Conclusion
Mastering the optical microscope relies on understanding its operation, adhering to rigorous usage procedures, and meticulous maintenance. By comprehending its components, carefully preparing samples, and adopting precise focusing techniques, your observations will improve in quality and reliability. Far from being static, optical microscopy continues to be enriched by innovations that make every exploration of the microcosm even more accessible and fascinating. Whether you are a student, researcher, or enthusiast, adopting these best practices will open the doors to a scientific universe of unsuspected richness.